Using Coolify Basic Authentication for custom services
Table of Contents
Introduction
Securing your services is a key step in maintaining a robust deployment environment. One common and simple way to add security is through Basic Authentication , which provides a simple mechanism to restrict access. In this article, I will showcase how to implement Basic Authentication for a Docker Compose service deployed on Coolify , an open-source, self-hostable platform.
We will walk through the steps to deploy a basic Node.js application that uses Prisma ORM for database access with PostgreSQL. Additionally, we will set up Prisma Studio , the web interface for managing your database, and protect it with Basic Authentication. By the end of this article, you will have a fully functional service secured with authentication ready to be deployed to Coolify. Let’s dive in!
Set up your compose file
In this section, we’ll walk through setting up a Docker Compose file that orchestrates the different services in your application. From configuring the Node.js app to setting up PostgreSQL and containerizing Prisma Studio, this Compose file will streamline your deployment and ensure all services work together seamlessly.
Containerize PostgreSQL
There isn’t much setup required to containerize PostgreSQL since Docker Hub provides official images that are easy to use. By using the postgres image, we can quickly spin up a PostgreSQL instance and ensure the data is persisted with Docker volumes.
The main thing to configure is a volume to store your database data, ensuring it survives container restarts. Here’s how to define the PostgreSQL service in your docker-compose.yml file:
version "3.8"
services:
db:
image: postgres:latest
restart: always
env_file:
- .env
volumes:
- postgres_data:/var/lib/postgresql/data
ports:
- "5432:5432"
volumes:
postgres_data:
Containerize your NodeJS app
Every Node.js application is unique, but containerizing it follows a fairly standard process. The goal is to create a portable, isolated environment where your app can run consistently across different machines. I won’t dive into the specifics of containerizing individual applications.
In the end you should get something like this in your docker-compose.yml file:
services:
app:
build:
context: .
dockerfile: Dockerfile
restart: always
ports:
# Assuming your app is exposed on port 3000
- "3000:3000"
volumes:
- .:/usr/src/app
depends_on:
- db
command: >
sh -c "npx prisma migrate deploy && npx prisma db seed && npm run start"Note: The command sequence ensures Prisma migrations are applied, your database is seeded, and the application is launched (assuming you have the start script defined in your package.json).
Containerize Prisma Studio
While this article focuses on deploying Prisma Studio as a database management tool, the same approach can be applied to other database web UIs like pgAdmin4, Adminer, or any similar tool.
Prisma Studio is a great visual tool for interacting with your database, allowing you to browse and edit your data easily. In a development or production environment, you might want to run Prisma Studio as a separate container to:
- Isolate it to run independently of the main application, reducing the chance of accidental data manipulation.
- Control who can access the tool.
- Stop, restart or remove the container without affecting the rest of your application stack.
To containerize Prisma Studio, the first step is to create a custom Dockerfile for it. This Dockerfile will install Prisma CLI and expose the Prisma Studio interface.
In your project directory, create a file named prisma-studio.Dockerfile:
# Use Node.js image as the base
FROM node:20
# Set the working directory inside the container
WORKDIR /app
# Copy only the prisma schema to keep the image size to a minumum
COPY ./prisma ./prisma
# Install the Prisma CLI globally within the container
RUN npm install -g prisma
# Expose the default port for Prisma Studio
EXPOSE 5555
# Run Prisma Studio
CMD ["npx", "prisma", "studio"]Now that we have a Dockerfile for Prisma Studio, the next step is to modify your docker-compose.yml file to include a service for Prisma Studio. The configuration will look like this:
version: "3.8"
services:
# Prisma Studio Service
prisma-studio:
build:
context: .
dockerfile: prisma-studio.Dockerfile
restart: always
volumes:
- ./prisma:/app/db
ports:
- "5555:5555"
depends_on:
- db
- appComplete Docker Compose file
Now that we’ve covered how to containerize the PostgreSQL database, Prisma Studio, and your Node.js application, let’s bring everything together into a single docker-compose.yml file.
version: "3.8"
services:
# Node.js Application
app:
build:
context: .
dockerfile: Dockerfile
restart: always
ports:
- "3000:3000"
volumes:
- .:/usr/src/app
depends_on:
- db
command: >
sh -c "npx prisma migrate deploy && npx prisma db seed && npm run start"
# PostgreSQL Database
db:
image: postgres:latest
restart: always
volumes:
- postgres_data:/var/lib/postgresql/data
ports:
- "5432:5432"
# Prisma Studio
prisma-studio:
build:
context: .
dockerfile: prisma-studio.Dockerfile
restart: always
volumes:
- ./prisma:/app/db
ports:
- "5555:5555"
depends_on:
- db
- app
volumes:
postgres_data:Add Basic Authentication
Since Prisma Studio does not provide built-in support for securing access with credentials, we will protect it with a simple username and password combination. To achieve this, we will use Traefik’s built-in middleware for Basic Authentication.
You’ll need to generate a hashed password to use in the authentication label. This can be done using the htpasswd command, which is available on most Linux distributions:
htpasswd -nbB <username> <password>For example, to create a user prisma with the password changeme123, run:
htpasswd -nbB prisma changeme123
# The output will look similar to this:
# prisma:$2a$12$Q8OU//wesT/s/.TLZBrv5.qr8GumsCk2KoYym11Vjm1I89zkeBuXuIf your OS does not have htpasswd and you prefer not to install it, you can use an online tool like the bcrypt generator to encrypt your password without using htpasswd.
Now, update your docker-compose.yml file to add Basic Authentication to the Prisma Studio service in Coolify. Simply add a new label to the prisma-studio service with your credentials:
# Prisma Studio with Basic Auth
prisma-studio:
build:
context: .
dockerfile: prisma-studio.Dockerfile
restart: always
volumes:
- ./prisma:/app/db
ports:
- "5555:5555"
depends_on:
- db
- app
labels:
- traefik.http.middlewares.studioauth.basicauth.users=prisma:$2a$12$Q8OU//wesT/s/.TLZBrv5.qr8GumsCk2KoYym11Vjm1I89zkeBuXuThis label will be used by Coolify and forwarded to Traefik to secure the container with Basic Authentication.
Note: although the credentials (username and hashed password) are stored in the docker-compose.yml file, this isn’t a security concern because the password is hashed using a strong hashing algorithm like bcrypt. This means the original password is not stored in plain text and can’t be easily reversed.
Deploy to Coolify
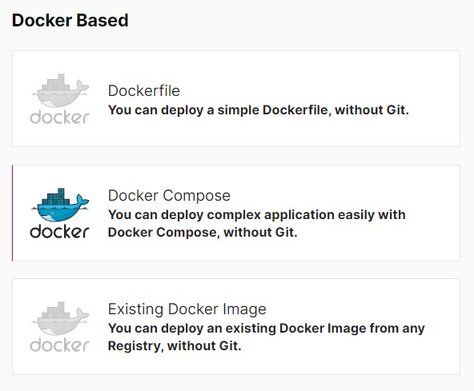
Once your docker-compose.yml is ready, deploying it to Coolify is straightforward. You can create a new resource within a project in Coolify and choose Docker Compose as the project type. Copy-pasting the Compose file you’ve created will be enough to get your application running.
While copy-pasting works for simplicity, a more robust solution would be to set up deployments via GitHub integration. This allows for easier management and updates, but for simplicity’s sake, you can stick with pasting the Docker Compose file for now.
When you deploy, Coolify will spin up the services defined in your compose file, which in this case are the Node.js app, PostgreSQL, and Prisma Studio services. Once deployed, the next step is to configure domains for your services.
You should assign domains such as:
- Node.js app:
https://app.yourdomain.com:3000 - Prisma Studio:
https://studio.yourdomain.com:5555
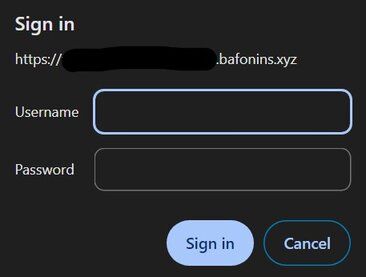
After setting up the domains, your app and Prisma Studio with Basic Authentication will be accessible over the web using your provided domain without port numbers (Coolify will handle this under the hood).